Announcements:
- March 7: Utah Quilt Guild Area Meeting
- March 16: National Quilting Day (Sew-In, Luncheon, & Demos from 9 a.m. - 3 p.m. at St. Johns The Baptist Gathering Place - 300 E 11800 S, Draper)
- March 19: Tooele County Quilters monthly meeting (remember to bring your completed apple, birdhouse, bee, beehive, and embroidered blocks for our "All Things Utah" quilt)
- June 6-8: Wild Horse Festival at Deseret Peak (please donate home-made items to sell; more information will be provided soon regarding the quilt show and prizes available at this event)
- October 8-12: Quilt Fest at the Zermatt in Midway
- November 4-8: Holiday Quilt Show at Little America (where our "All Things Utah" quilt will be auctioned)
Library Book of the Month:
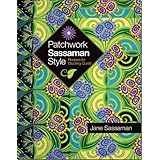 |
| Patchwork Sassaman Style: Recipes for Dazzling Quilts |
Tips of the Month:
Pilot Frixion Pens: The ink is thermo-sensitive, and is removable by erasing/friction (because friction generates heat). The little nubs at the end of the pens are the erasers. The marks will re-appear when put into the freezer, but will wash out easily with a light hand-washing using a little bit of liquid hand soap or dish soap.
Pressing vs. Ironing: "Pressing is using the weight of the iron and its heat to remove wrinkles and flatten seams. Ironing is moving the iron back and forth. Pressing is lifting the iron up and down. Pressing is for quilters!" (Sew, Mama, Sew!)
Civil War Blocks
to be completed by March:
 |
| Underground Railroad |
 |
| Log Cabin |
Salt Box Sampler:
Complete through page 10 by the March meeting. The question came up of how to "pop" your seams for pressing (also called "spinning"). Here's a good tutorial from Perkins Dry Goods blog. Also mentioned were two useful rulers for squaring up blocks:
- The Square Squared Ruler by Deb Tucker (click HERE for a great youtube video of Deb Tucker, herself, explaining the ruler), and
- The Pineapple Ruler (click HERE for a great youtube video explaining how to use the ruler).
Disappearing Four-Patch:
The Many Ways to Use Squares by Verneal Lowry
Thank you, Verneal, for a wonderful and informative class on a variety of ways to use squares to make beautiful quilt blocks.
 |
1. Sew 2 sets of contrasting squares together.
2. Sew the sets together into a 4-patch.
3. Cut the 4-patch, using the center seam as the guideline.
4. Now you have a 9-patch. . . flip the middle piece in the top and bottom rows and the outside pieces in the middle row and sew back together!
|
 |
| Or, cut the 4-patch on the diagonal. You must have two 4-patch blocks to rotate the pieces for a windmill. Cut and rotate the windmill block the same as the 4-patch block in the first sample. |
 |
| Variations: use 4 different colored squares; assemble blocks in a variety of ways to achieve the look you desire. |
Next Month: Daisy Block
For each block, bring:
- One 6 1/2" square of background fabric
- Two 2 1/2" x 5" rectangle of background fabric
- One 4" x 5" rectangle of fabric for daisy
- One 1 1/2" square of fabric for daisy center


.JPG)


